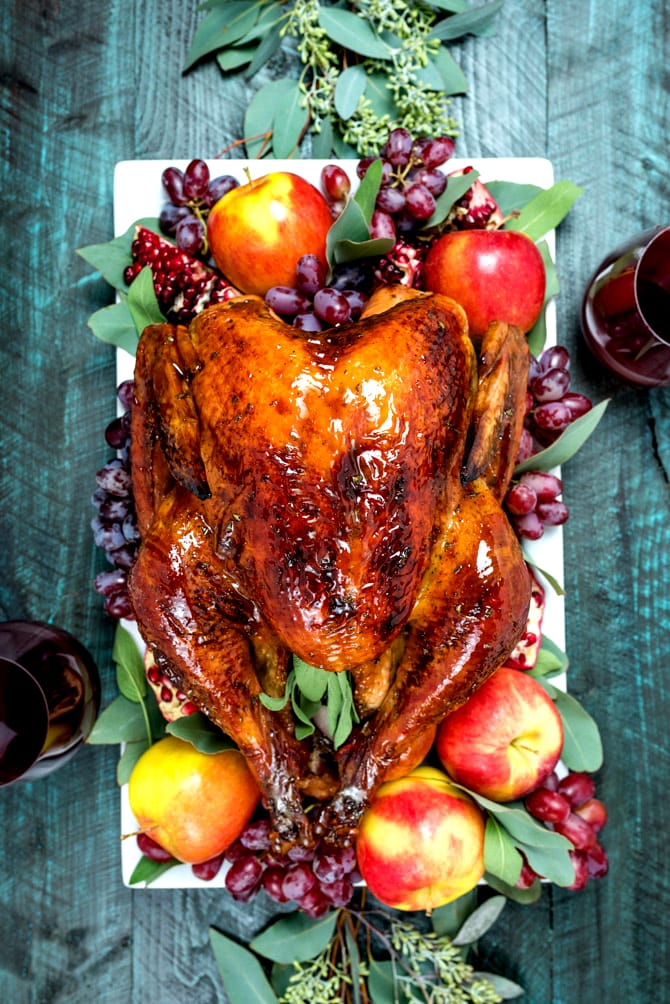
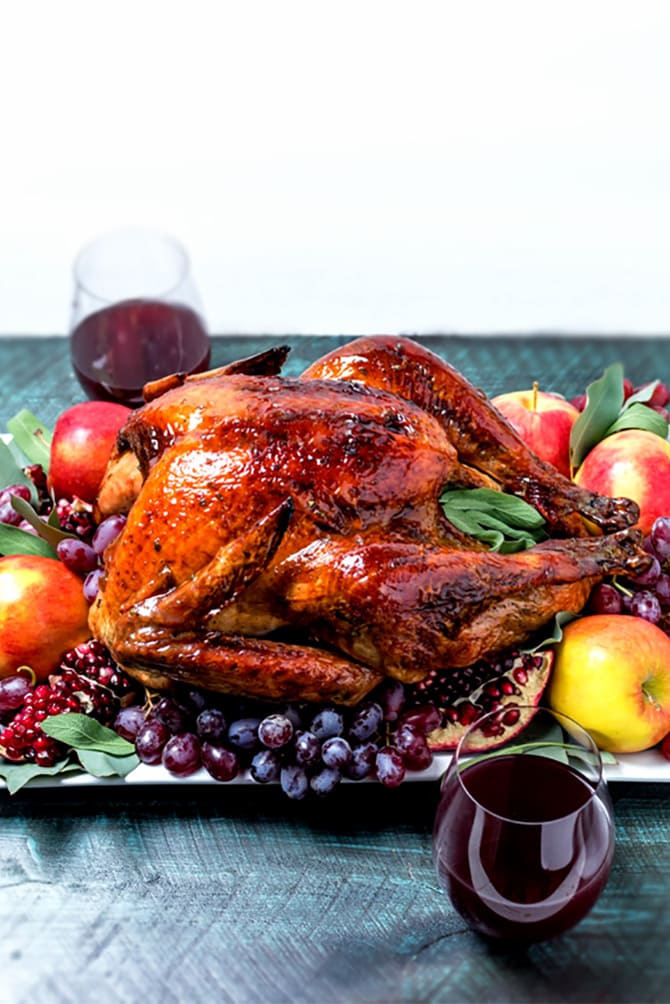
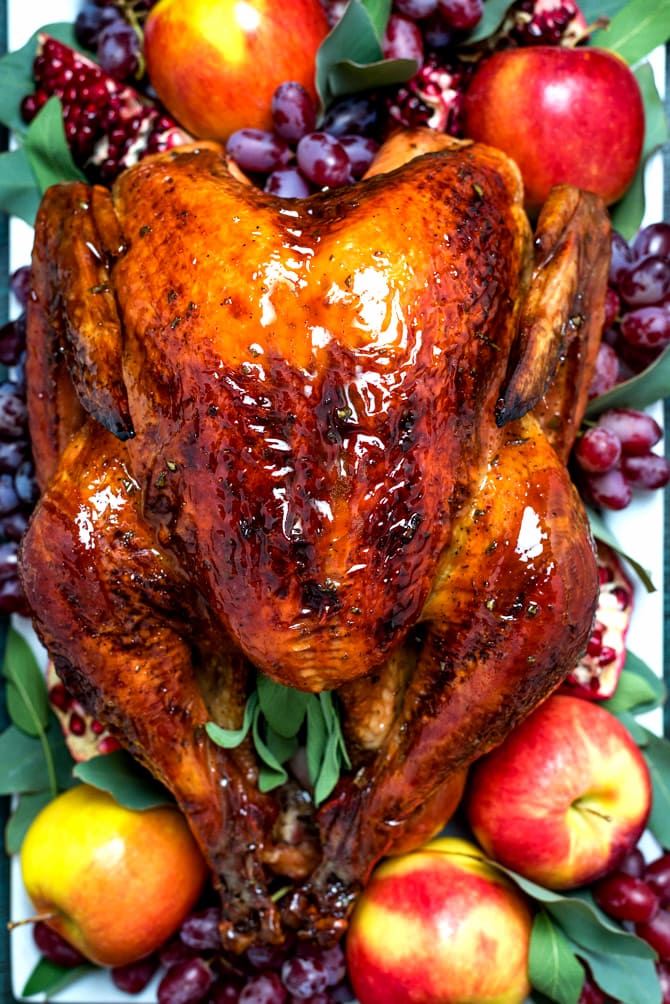
Juicy Cider and Sage Glazed Turkey with Gravy. Dry-brined and brushed with a buttery apple cider mixture, this turkey has crisp browned skin and moist, delicious meat.
Every year, I do at least three Thanksgiving celebrations. I spend the actual day with James' family, I go to my grandma's house for a Thanksgiving get-together the Saturday after, I do a "Post-Thanksgiving Thanksgiving" with my mom and brother a week later, and most years, I try to fit a "Friendsgiving" in there somewhere. It's a lot. And when you do a lot of Thanksgivings, that of course means there's a lot of turkey. A lot of-- no offence intended to anyone who might be reading this-- less-than-stellar turkey.
Isn't that sort of a universal expectation at this point? It seems, at least to me, that people get excited for the sides like stuffing and mashed potatoes and mac n cheese, but the turkey is more there out of obligation than it is adoration. Probably because 9 times out of 10, it's exceptionally bland, with dry, sawdust meat and soggy skin. You know what I'm talking about-- the kind of turkey you have to chew and chew and chew until it forms that familiarly awful turkey paste for you to choke down, knowing it couldn't even be remedied with a metric ton of gravy. Oof.
But on a rare occasion, someone actually gets the turkey right. This Juicy Cider and Sage Glazed Turkey with Gravy is one of those times. Thanks to a dry-brine and a sweet, buttery glaze, this turkey winds up with juicy meat; gorgeously browned, crisp skin; and a ton of flavor. (Not to mention, some delicious homemade gravy, to boot.) This is the turkey that will get your family to actually love the turkey again. Let the fact that we ate devoured 30 pounds worth of it while testing this recipe in my house be a testament.
WHAT IS A DRY BRINE?
Before I get into what a dry brine is, I first have to explain a little about brining in general.
The basic process of brining a turkey involves soaking it in heavily salted water overnight. While it soaks, the turkey absorbs some of that water, and it retains that water even after the meat is cooked, so it won't dry out. And it's not just a little juicier. In fact, the turkey typically retains up to 30 to 40% more moisture after brining, which is certainly nothing to scoff at if a moist bird is your end goal.
But brining does have its downfalls.
For example, I'm sure you want moist meat, but nobody wants moist turkey skin. And when you soak a turkey in water for a day, yes, the skin suffers. Not to mention, the retained water... well, it waters down the natural flavors of the turkey juices, unsurprisingly. And most importantly, who has room in their fridge to submerge an entire turkey overnight? I know a gigantic bucket isn't fitting in my fridge, especially when I have all of the rest of my Thanksgiving menu ingredients taking up prime real estate in there. So what's a gal to do?
The answer is dry brine.
Dry brine is basically the act of generously salting the meat and letting it sit. That's it. The salt draws out the juices in the turkey, then dissolves in the juices to form a (very concentrated) briney liquid, which loosens muscle fibers so the salty juices can get reabsorbed again and again, all the way down through the meat of the turkey. As this is happening, the skin of the turkey is exposed to the air in your fridge, which allows it to dry out. In the end, you get crisp, golden skin and well-seasoned, plump and juicy turkey meat throughout. That's something to get excited about.
WHY SHOULD I GLAZE MY TURKEY?
While the natural flavors you get from dry-brining are delicious, it never hurts to dial things up a bit if you want to really wow 'em. And in my opinion, nothing's more impressive than a beautifully burnished, sweet-skinned bird. Not to mention, those apple cider and butter-flavored drippings make their way into the bottom of the pan, which will flavor your gravy in the most amazing way! Seriously, this might be the best gravy you've ever had.
All you have to do for the glaze is combine apple cider, brown sugar, and chopped sage in a small saucepan, and let it boil until the mixture reduces and is lightly syrupy. Then, stir in butter, a bit at a time, until fully melted, and brush it all over your bird. Easy.
HOW SHOULD I COOK MY JUICY CIDER AND SAGE GLAZED TURKEY WITH GRAVY?
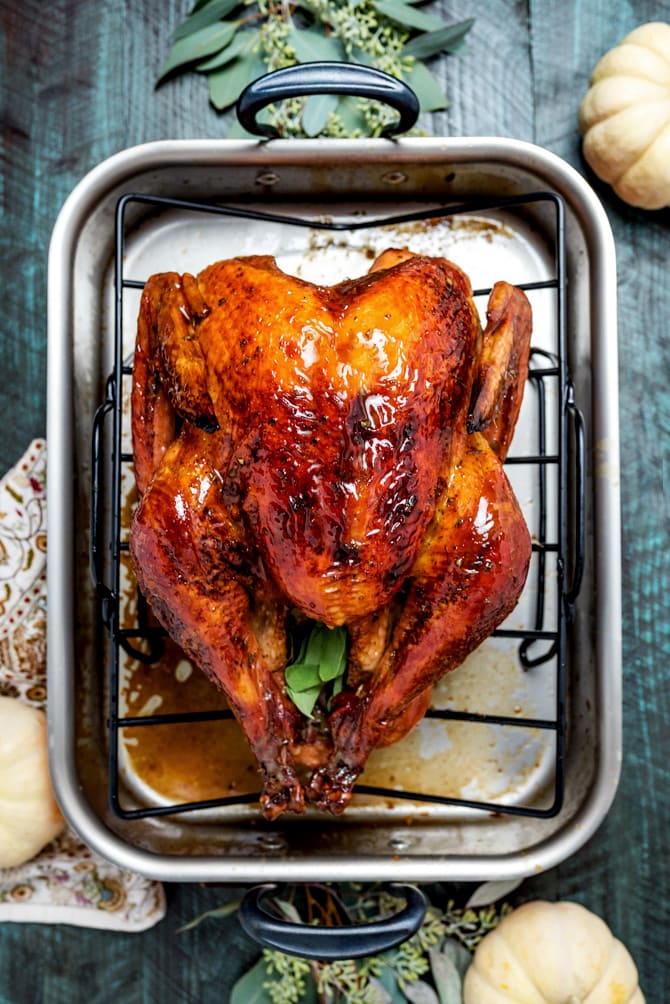
This isn't my first turkey rodeo. Last year, I made a butter-rubbed spatchcocked turkey that you might remember. This year, I decided to cook my turkey in a roasting rack instead for a few reasons:
- While I love the result that spatchcocking gives, I do not love the process. Removing the backbone, cracking the breast, and sacrificing that much fridge space is a lot to ask of someone who already has a ton to prepare for Thanksgiving.
- Aside from the fridge space, you actually might not have enough room in your oven. It can be difficult to make a butterflied turkey-- especially a large one-- fit in the oven, and if you're not careful, you can get some overhang and overflow of juices which can burn in your oven.
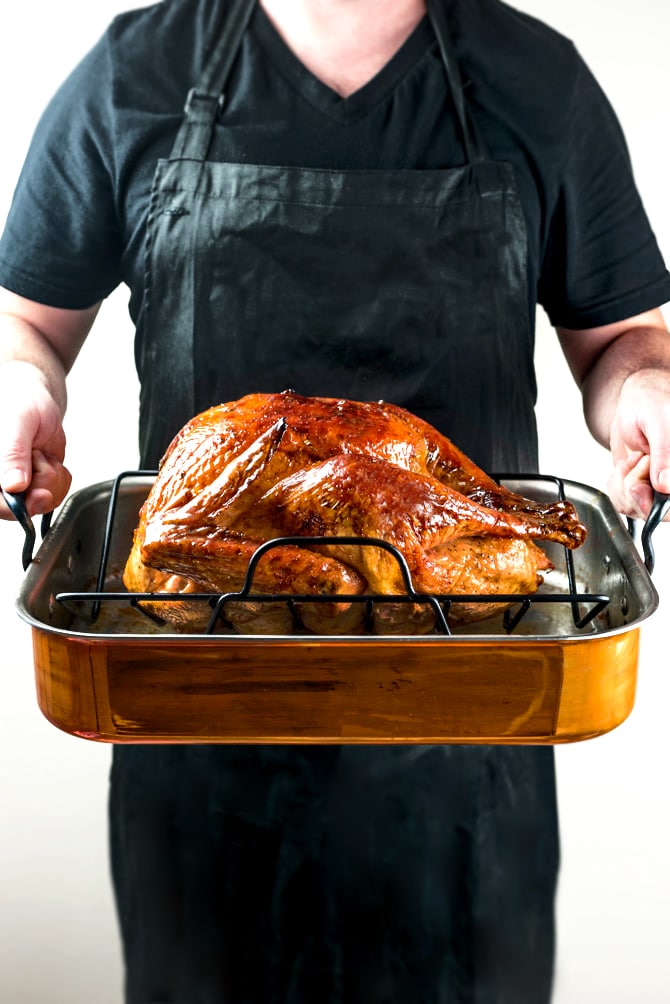
- I fell in love with this absolutely beautiful Mauviel Copper Roasting Pan, which can be used in any type of oven or on the stovetop, and
- Since it can be used on the stove top, I knew using this roasting pan would allow me to make the gravy right in the pan, so I could whisk up all of the drippings and burnt on browned bits to create an incredibly flavorful gravy.
All you have to do to make the gravy is add 1-2 cups of broth or stock to the drippings and heat it on the stove. Once it boils, spoon some of the hot liquid into a small bowl with ¼ cup of flour and whisk until you get a paste. Then spoon some of the paste back into the roasting pan and whisk it all together until the flour is fully incorporated and the gravy is smooth. It's a lot of whisking, but it's worth it. At the end, you can whisk in a little more broth or stock to thin it to your desired gravy consistency, and it's good to go!
WATCH THE JUICY CIDER AND SAGE GLAZED TURKEY WITH GRAVY VIDEO
Juicy Cider and Sage Glazed Turkey with Gravy
- Total Time: 3 hours
- Yield: serves 8
Ingredients
For the Juicy Cider and Sage Glazed Turkey:
- ¼ cup kosher salt
- ¼ cup light brown sugar, divided
- 2 teaspoons black pepper
- 1 thawed, natural (12-to 15-pound) turkey
- 2 apples, cored and quartered
- 3 shallots, peeled and halved
- 2 sprigs rosemary
- 1 large bunch sage, divided
- 1 cup unfiltered apple cider
- 6 tablespoons unsalted butter, sliced
For the Gravy:
- 2 cups low-sodium turkey stock, chicken stock, chicken broth, or water, plus more as needed
- ¼ cup all purpose flour
Instructions
- In a small bowl, mix together the kosher salt, 2 tablespoons of the light brown sugar, and the black pepper to form the dry brine mixture. Set aside.
- One to two days before cooking your turkey, place it on a wire rack set over a rimmed baking sheet and pat dry all over with paper towels. Sprinkle and rub the dry brine mixture all over the turkey, including in the cavity. Place the turkey, uncovered, in the refrigerator for at least 8 hours, and up to 48. The longer the better. Make sure that the turkey isn't touching anything.
- When ready to cook, take the turkey out of the refrigerator for 30 minutes and then preheat the oven to 425°F. Do not rinse the turkey.
- Stuff the cavity of the turkey with the apples, shallots, rosemary, and sage (reserving 4 sage leaves for later). Truss the turkey and transfer to a roasting pan. Roast for 45 minutes.
- Meanwhile, chop the remaining sage. In a small saucepan, combine the chopped sage, apple cider, and remaining brown sugar. Bring to a boil, stirring occasionally, until the sugar is dissolved and the mixture is reduced to about ¼ cup, about 10 minutes. Remove from heat and whisk in the butter, a bit at a time.
- Remove the turkey from the oven and reduce heat to 350°F. Brush generously with the glaze. Return the turkey to the oven and continue to cook until a thermometer inserted to the thighs registers 170°F, brushing with glaze every 30 minutes. The total cook time should wind up being around 2 hours. If the wings or legs start to get too dark, cover them with small pieces of tinfoil.
- Let the turkey rest for 30 minutes before carving and serving.
- When the turkey is ready to serve, lift it from the roasting pan and place the roasting pan on the stove over medium heat. In a small bowl, spoon about ¼ cup of the hot liquid into the bowl and whisk until a smooth paste forms. Then add a spoonful of the paste to the roasting pan and whisk until thickened with no lumps remaining, about 10 minutes. Make sure you're scraping up the bits at the bottom of the pan. Add more of the flour paste as needed. Once thickened, you can whisk in additional stock, broth, or water, if desired.
- Serve the turkey with the gravy.
- Prep Time: 1 hour
- Cook Time: 2 hours


Roger says
Hello,
Just wondering if you use 'Unfiltered Apple Cider Vinegar' or Juice?
Thanks!
Morgan says
Regular apple cider (juice)! 🙂
Marilyn says
Can I use apple butter as well
Monir says
How long will it take to cook a 29 pound Turkey this way? My wife and I are super stoked to try out this recipe but the school we work out gave faculty free birds for the holidays and it’s way bigger than we expected.