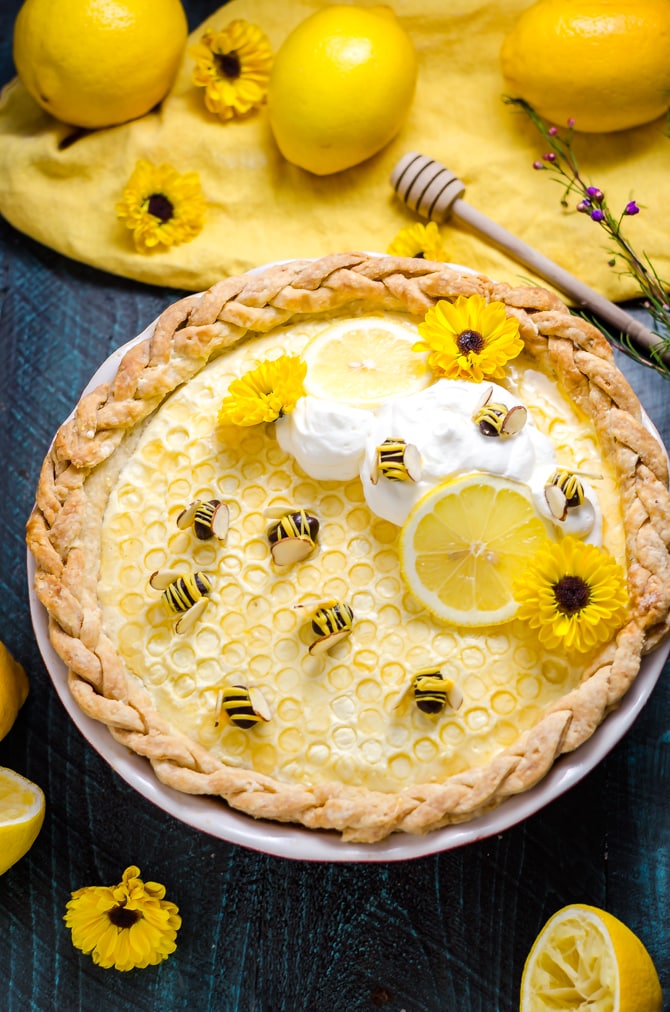
Well I'll bee damned.
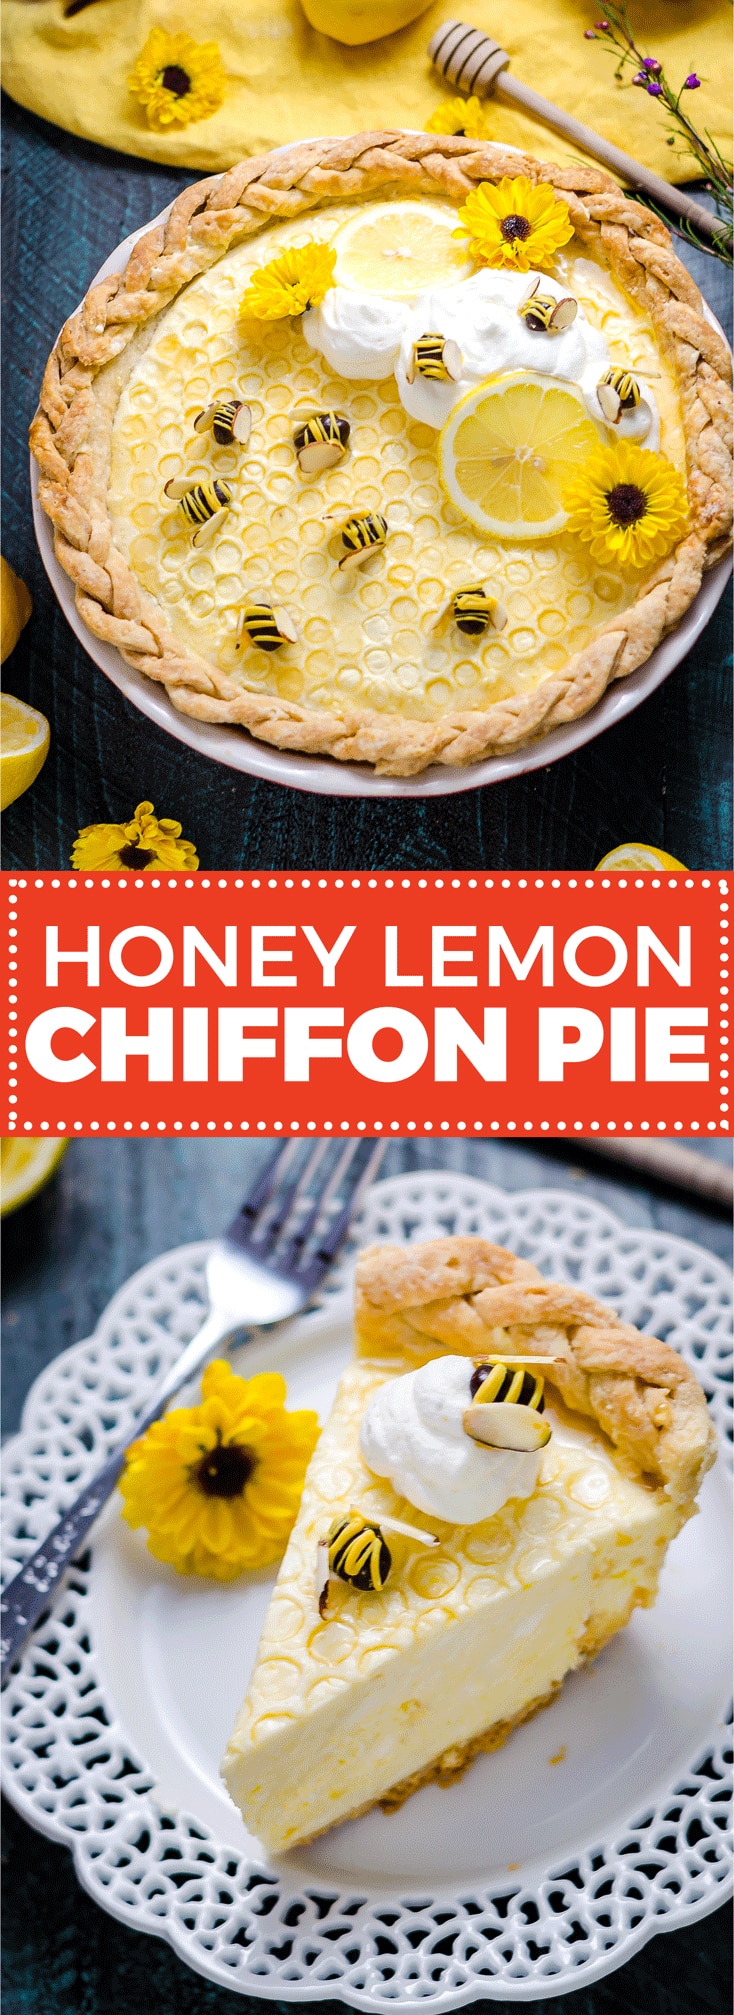
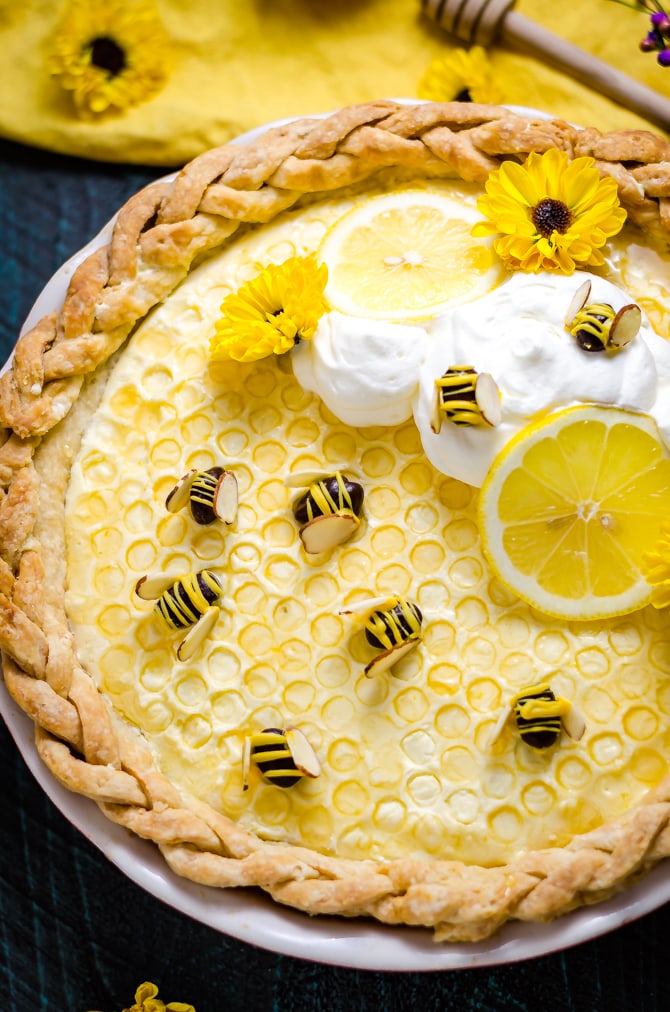
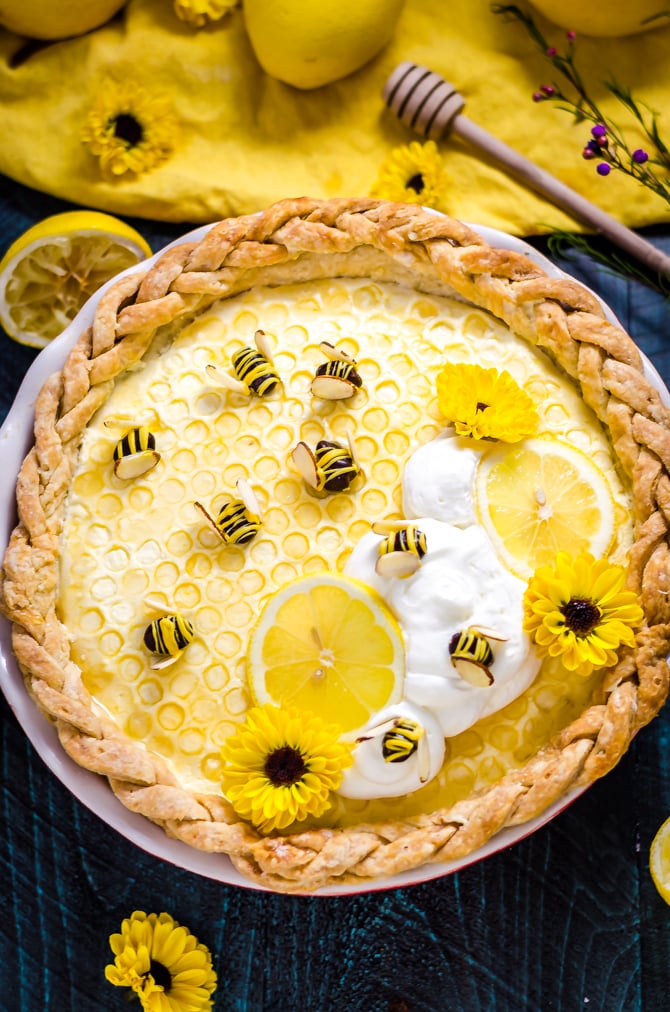
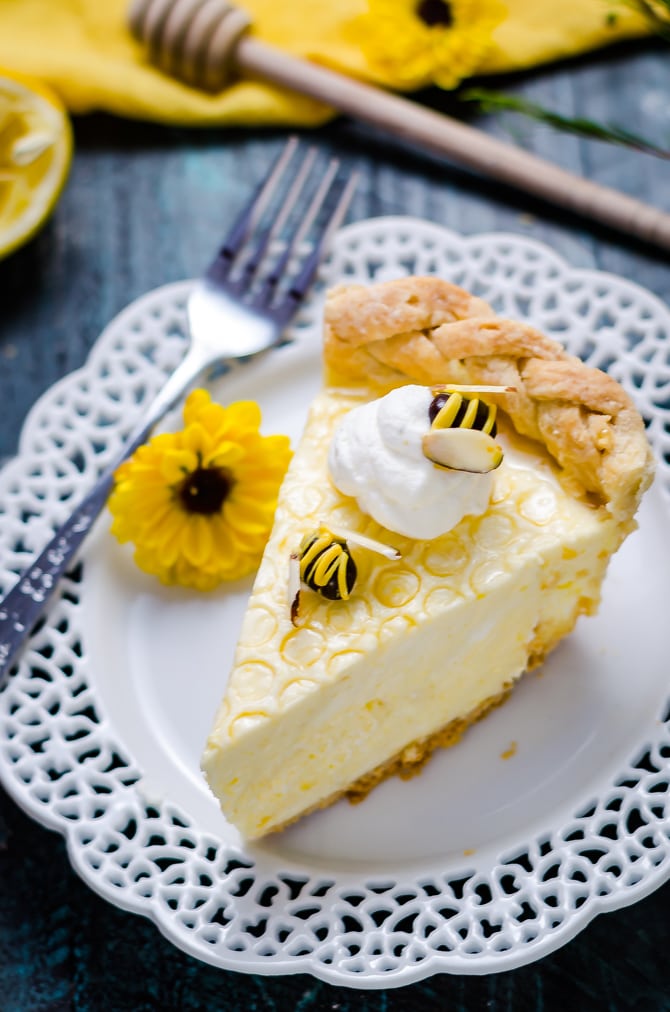
I've gotta tell you, I said "this probably isn't going to turn out" to myself at least 17 times as I made this pie. But much to my surprise, the bees wound up looking like bees, the honeycomb pattern looked like honeycomb, the filling set to an awesome consistency, and the Honey Lemon Chiffon Pie... well, I don't want to be arrogant and say that it wound up perfect, but it tasted pretty perfect to me.
Let me just tell you, by the way, I'm no pie expert. I can count on one hand all of the pies I've ever made-- they're all on this blog, actually. I still get nervous about making my own crust, and I always worry that using new techniques will leave me stuck in the dark alleyway between "you tried your best" and "at least it's edible." I'm convinced that pies can smell my fear.
Still, when I saw the inspiration for this pie I knew I had to go for it-- you gotta dream big, after all.
And if I can pull this off, you're going to absolutely rock it.
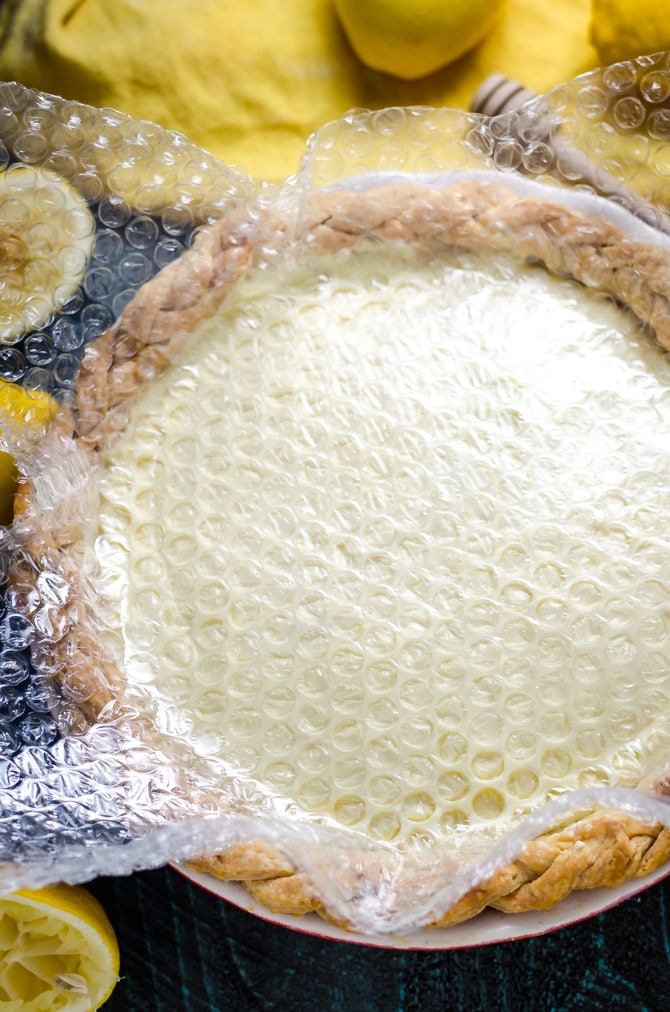
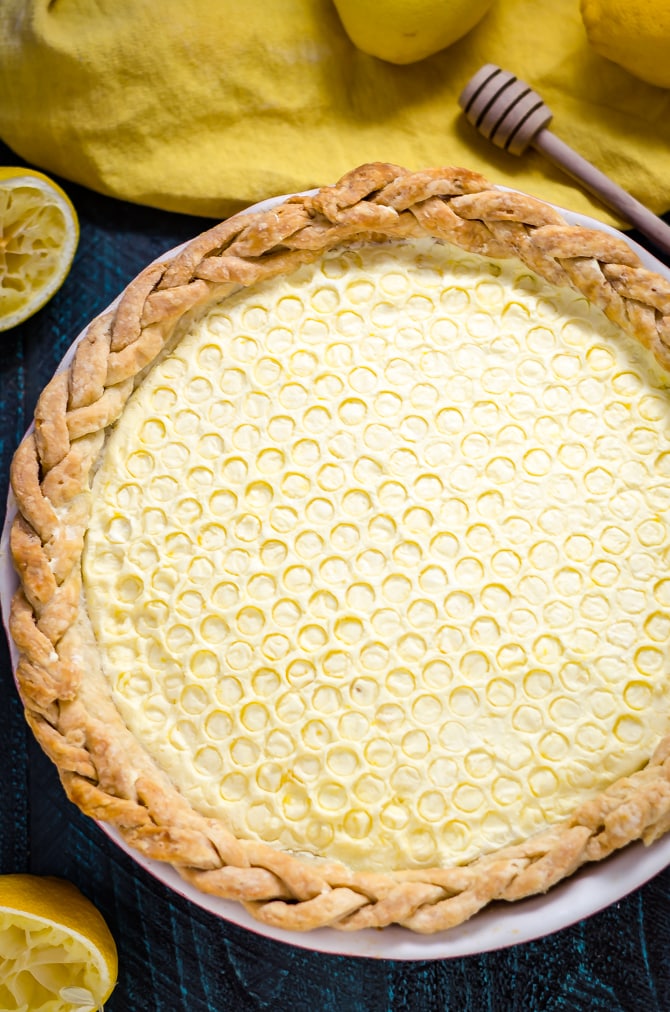
This Honey Lemon Chiffon Pie was inspired by The Pie and Pastry Bible by Rose Levy Beranbaum, who (as far as I know) created the honeycomb-topped pie technique. Can you tell how it's done? It might look like there's some craftsmanship involved in making those perfect indentations, but all you have to do is press bubble wrap on top of the pie as it sets in the freezer. How awesome is that?
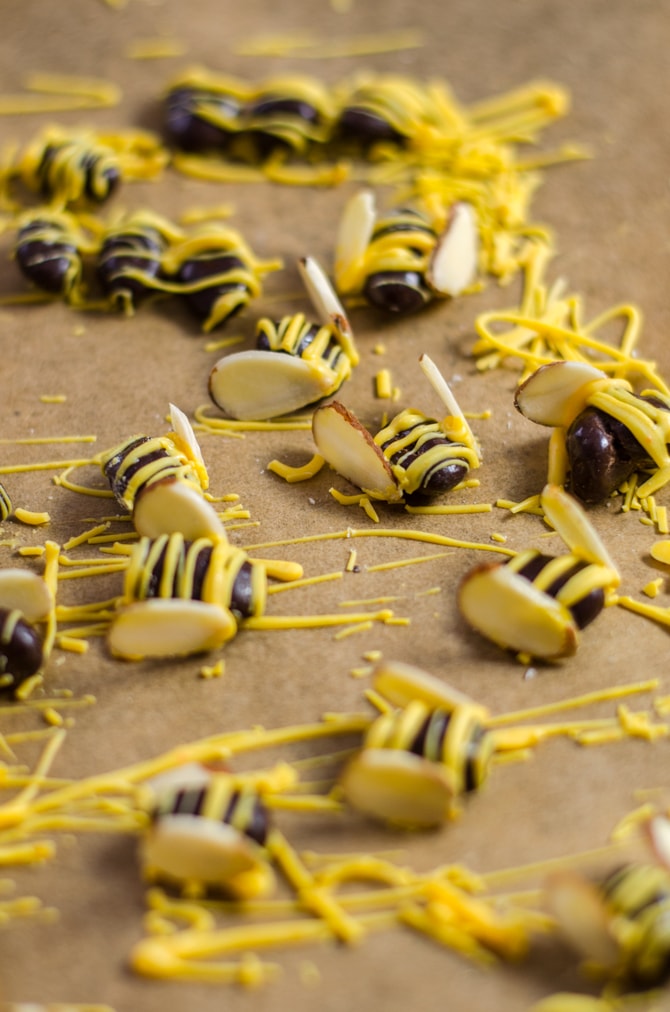
And the bees! I made the bees by adding a couple of drops of yellow food coloring to a small bowl of white chocolate wafers, microwaving them together, and drizzling the melted mixture over some chocolate-covered raisins. Then I took almond slices, dipped the ends in the white chocolate, and stuck those to the sides of the "bee bodies" to look like wings. Adorable, right?
I love that the honeycomb pattern and little bees made this Honey Lemon Pie really work for spring or summer. I mean, when I think pies, my mind usually goes to fall-- to gooey, warm, and bubbly fruits tucked beneath ultra-buttery crumbles and crusts, or to dense pumpkin purees overloaded with cinnamon and nutmeg. But with Pi Day around the corner, I wanted to make a pie that was billowy, bright, and used seasonal flavors. And the first thing that came to mind was a sunshine-yellow chiffon pie with bumble bees and flowers and citrus. It feels like the perfect Easter or Mother's Day dessert, doesn't it? Especially if you're a lemon-lover like me.
Don't forget to take a picture for Instagram, as always! You can tag #hostthetoast and show off your pie to the world. Can't wait to see yours!
Print
Honey Lemon Chiffon Pie
- Total Time: 2 hours 6 minutes
- Yield: 8 servings 1x
Ingredients
- 1 (3.5 ounce) box chocolate-covered raisins
- ⅓ cup white chocolate melting wafers
- Yellow food coloring
- ¼ cup sliced almonds
- 1 9" blind-baked pie crust
- ¼ cup cold water
- 1 package (2 ¼ teaspoons) unflavored powdered gelatin
- 1 cup clover honey, divided
- ⅛ teaspoon salt
- 1 cup fresh lemon juice, strained, divided
- 1 tablespoon finely grated lemon zest
- 4 large egg yolks
- 2 cups heavy cream, divided
- 5 tablespoons confectioners’ sugar, divided
- 1 teaspoon vanilla extract
- Bubble wrap, to set
- Lemon wheels, to garnish, optional
- Flowers to garnish, optional
Instructions
- Line a rimmed baking sheet with parchment paper. Line the chocolate covered raisins in rows.
- Place the white chocolate melting wafers and a few drops of food coloring in a microwave safe bowl. Microwave to melt according to package directions. Mix until smooth and yellow.
- Dip a fork into the melted chocolate and then quickly wave the fork over the chocolate-covered raisins, back and forth, drizzling over the melted yellow chocolate to create stripes. Dip the ends of the almond slices into the remaining melted chocolate and press the almond slices onto the sides of the chocolate-covered raisins to create wings. Allow the chocolate to set before moving the bees.
- Meanwhile, make an ice bath ready by partially filling a large bowl with ice cubes and cold water.
- Pour ¼ cup cold water into a saucepan and sprinkle all over with gelatin. Let the mixture sit until the gelatin absorbs all of the water, about 5 minutes. Stir in ¾ cup of the honey, and then whisk in the salt, ¾ cup of the lemon juice, lemon zest, and egg yolks. Place the saucepan over medium heat and cook for about 6-8 minutes, stirring constantly, until the mixture has thickened slightly. Don't let the mixture come to a full boil. It will continue to thicken much, much more as it cools.
- Immediately transfer the saucepan to the ice bath to let cool until the lemon mixture is cold to the touch. Whisk occasionally to make sure the mixture is cooling evenly.
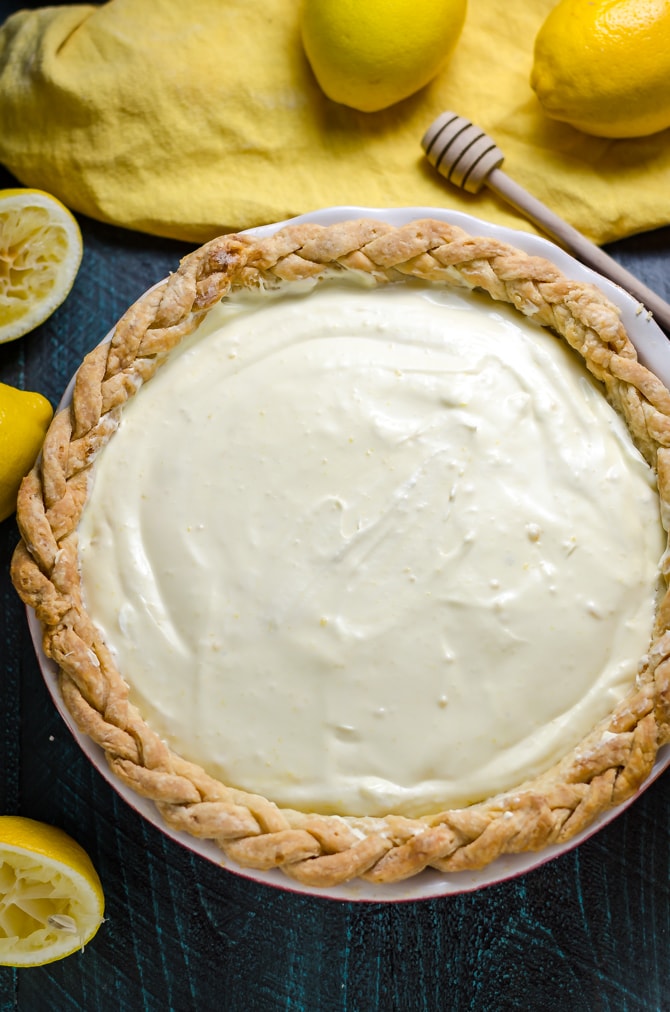
- Beat 1 ½ cups of the cream with ¼ cup of the confectioner's sugar until soft peaks form. Mix in the vanilla extract and beat again until stiff peaks form. Fold the whipped cream, a bit at a time, into the cooled lemon mixture. Keep folding until smooth and well-combined. Pour the mixture into the prepared crust and smooth the top. Firmly press the bubble wrap, bubble-side down, onto the surface of the pie. Make sure that the filling has filled in all of the crevices in between the bubbles to get the neatest indentations. Transfer the pie to the freezer for at least 4 hours, to set. Once you can peel the bubble wrap off without disturbing the filling, it's ready to glaze.
- In a microwave-safe bowl, combine the remaining honey and lemon juice and microwave for 30 seconds, or until softened. Mix well and brush over the top of the frozen pie. Refrigerate the pie for an hour to thaw.
- In a large bowl, whisk the remaining cream and confectioner's sugar until stiff peaks form. Spoon the whipped cream on top of the pie and decorate with the honey bees, lemon wheels, and flowers. Serve.
- Prep Time: 2 hours
- Cook Time: 6 mins




Audrey says
Morgan - soooo adorable! I can't bake worth a fig so I really appreciate the beauty! 🙂
Josh says
I made this and am entering into a pie contest with it. I think it needs a little less vanilla in the whipped cream and a little more honey depending on how the lemons are in your area. Also, I'm going to do it with a grahm cracker crust. Finally, I used dark chocolate covered almonds for the bees since I my family doesn't really like raisins. Solid recipe!
Lauren says
Those are exactly the changes I plan on making- how did it turn out?
ann says
HI I have attempted the filling this morning but it has not really thickened? Should it still be runny prior to adding the whipped cream mixture?
Ashley says
Great recipe! My friends and family were super impressed when I shared this pie today. I wish I could share a pic. It looked so great!
Also - I was wondering if you have tried to add lavender syrup?
Morgan says
I haven't, but I bet that would be wonderful. I'll have to experiment with that next time. Also, I'm so glad you and your loved ones enjoyed the recipe! 🙂 Thank you for letting me know, and for the inspiration!
PS. I'd love to see a photo! You can link one here from imgur or instagram if your IG is public! Or you can post it at reddit.com/r/morganeisenberg!
Jessica says
Is this possible to make without eggs (no egg substitute either)? I have made baked goods that call for eggs by replacing them with 1/4 C applesauce per egg and it has worked well. Do you think that would work well with this pie?
LaDawn says
I used yellow M&Ms with chocolate stripes for my bees! So cute
Kathy The FUN Baker says
Hi Morgan,
I haven't tried to make your Wonderful pie recipe yet since I just found it, but I have to say it looks AmaZing!! I can't wait. I am allergic to regular chocolate so I'm thinking of subbing in carob-covered raisins for the bees. Thank you for sharing your recipes, thoughts, & enthusiasm with all of us!
Happy Cooking, My Friend!! xoxo
Laura says
I made this pie exactly as it is written and it was a HUGE hit with my extended family at our Easter gathering. I highly recommend this recipe for a fun and impressive pie for any gathering but it was especially nice at a spring time event.
Kay says
I made this pie years ago and it was a big hit.
Now I'm ready to make it again for this Easter, but want to make it a day ahead. Would it work to make ahead (steps 1-7) and keep it in the freezer overnight and then finish up the next day so it's ready for Easter lunch dessert?