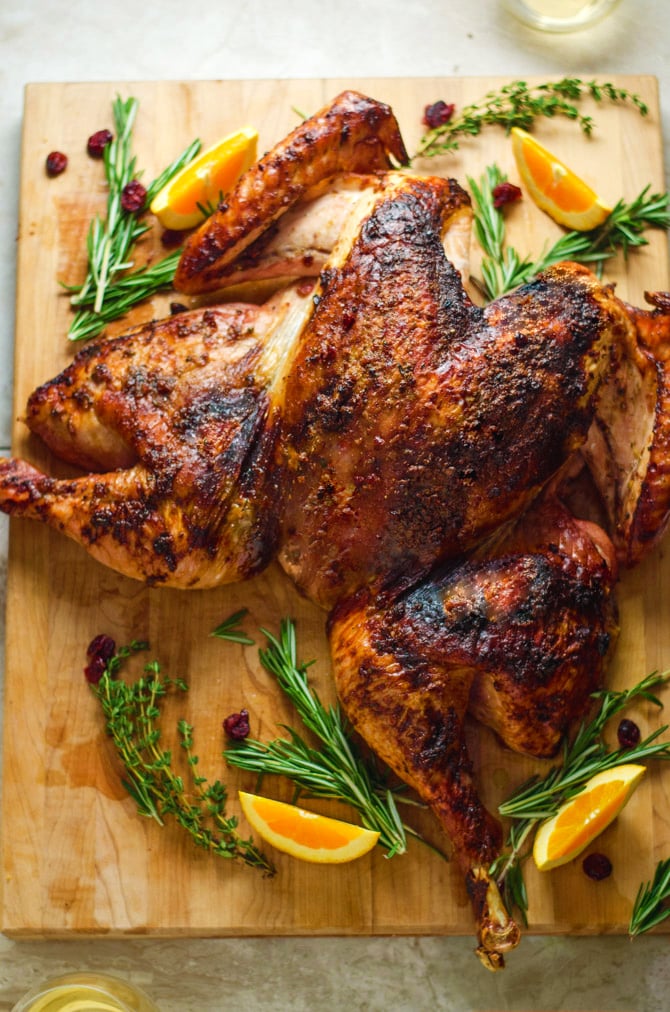
See all of those glorious blackened bits? I bet you can't make this turkey and not pick off some of those morsels to eat them before serving. Go on and try-- call it an impossible exercise in self-restraint.
Just like with any "blackened" recipe, the charred bits on this Crispy Cranberry-Herb Butter Butterflied Turkey with Roasted Vegetables are the result of browned milk solids and charred seasonings forming a crust on the turkey skin. In other words, every crispy, crunchy speck isn't just there for your textural enjoyment, it's also loaded with flavor.
That flavor, more specifically, is a combination of cranberry, herbs, orange zest, and garlic. I make a compound butter using all of those ingredients (plus butter, obviously) and rub it all over the turkey's skin... and under it. Rubbing butter under the skin helps it crisp up, keeps the turkey moist, and flavors the meat below. All-around improvements, I'd say!
But that's not all. Sure the butter helps the skin crisp, but for truly crispy skin, I spatchcock my turkey. Spatchcocking is a form of butterflying that allows all of the skin to face upward, preventing it from getting soggy as it often does beneath the turkey.
Additionally, since the turkey has been flattened out, it can be cooked at a higher temperature. High heat intensifies flavors, producing compounds that result in the complex, savory, and rich notes that are absent with lower-heat, basting methods. Those crispy bits we were talking about earlier? They wouldn't exist with an old school low-and-slow roasted turkey.
And of course, spatchcocking takes care of one of the biggest turkey issues known to man kind: the issue of the breast cooking faster than the legs. How many times have you had turkey with what was essentially sawdust-dry white meat that had to be drowned in gravy? The issue was probably that the breast cooked through far earlier than the legs did, so it spent extra time in the oven and got overcooked in the process. The spatchcocked turkey, however, cooks more evenly and keeps the bird juicier than I ever imagined possible with previous methods. No gravy-floods necessary this time.
As the recipe name implies, turkey's not all you get for your efforts with this recipe. A roasted vegetable side cooks right along with the turkey-- or really I should say right below it-- thanks to a method I'm copping from Alton Brown. The juices from the turkey drip down into a roasting pan full of root veggies and flavor them as the turkey cooks. That's the most beautiful multitask cooking you ever heard of, right?
And as if that wasn't all enough, it's faster to make. Cooking a 13 pound turkey will traditionally take about 3 ½ hours in the oven without any special seasoning or sides. However, this Crispy Cranberry-Herb Butter Butterflied Turkey with Roasted Vegetables takes a total of less than 3 hours from start to finish, some of which can be done ahead of time!
So do you pick the longer-to-make, often dry, less flavorful, not at all crispy, veggie-less version of traditional Thanksgiving dinners past, or this one? Decisions, decisions.
I assume you picked this one (good choice), so I'll continue.
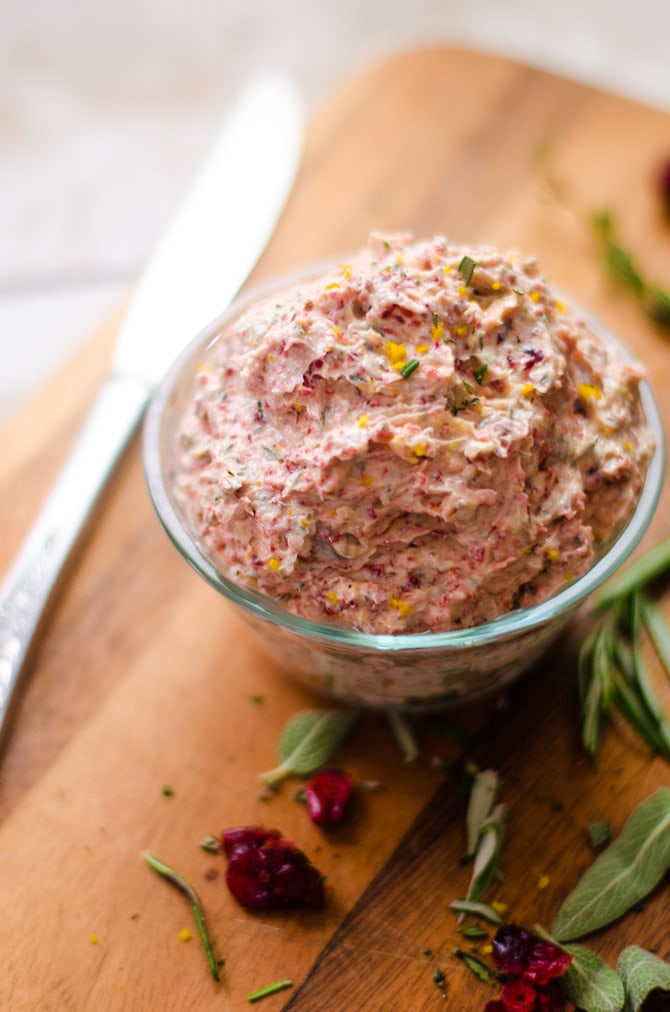
This right here is where all of that extra deliciousness enters the picture: Cranberry-Herb Butter. All I do to make it is add softened butter, dried cranberries, orange zest, a few cloves of garlic, fresh sage, fresh thyme, fresh rosemary, salt, and black pepper to my food processor and pulse until it turns light pink. The butter is slightly sweet and tart, has a bit of spiciness from the garlic (which will mellow more as it cooks) and of course has plenty of the signature "Thanksgiving" earthiness from the herbs. Yeah, this stuff is good.
Once the compound butter ingredients are well-combined, I transfer it from my Cuisinart Elemental Food Processor (which I highly recommend if you don't have a food processor yet-- you'll notice that I use it a lot) to a small bowl, and set it aside while I get moving on spatchcocking that turkey.
In order to spatchcock a turkey, you have to remove the backbone. To do this, I use poultry shears, like these Oxo Good Grips Poultry Shears, to cut along either side of the turkey's spine, from bottom to top. It's important to use poultry shears because regular kitchen scissors will not be able to cut through small bones. I remove the spine, saving it for gravy, and then open the turkey up. I flip the turkey over, place my hands on the breast, and press down very firmly to flatten the turkey out. You'll hear little cracking sounds if you're doing it right. Then I simply tuck the wing tips behind the turkey, position the legs so that they point outward, and then, my friends, I can consider my turkey properly spatchcocked.
Like I said, it's easy if you aren't squeamish about the whole cutting out the spine thing. If you are, you can just have your butcher do it for you instead.
The next part, however, is all you. Insert a hand in the space between the breast and skin at the bottom of the turkey. Use your hand to separate the skin from the meat, working your way up both halves of the breast and over to each thigh. Then, grab some of that compound butter and push it underneath the skin, again getting in each thigh and both breast halves. To make sure the butter is evenly distributed, use your hands on top of the skin to massage the butter around. It's okay if you get some of the compound butter on top of the skin while doing this, because the next step is to rub all of the remaining butter over the turkey. Once you've rubbed it all on there, you can go wash your hands (finally) and prepare the vegetables.
Many thanks to my friend Rob for taking these photos for me while I obviously was smothered in butter and turkey juices. Hopefully they clear up any confusion about the spatchcocking and butter-stuffing, but if it's not totally clear don't hesitate to ask questions in the comments. It's actually very easy once you know what you're doing!
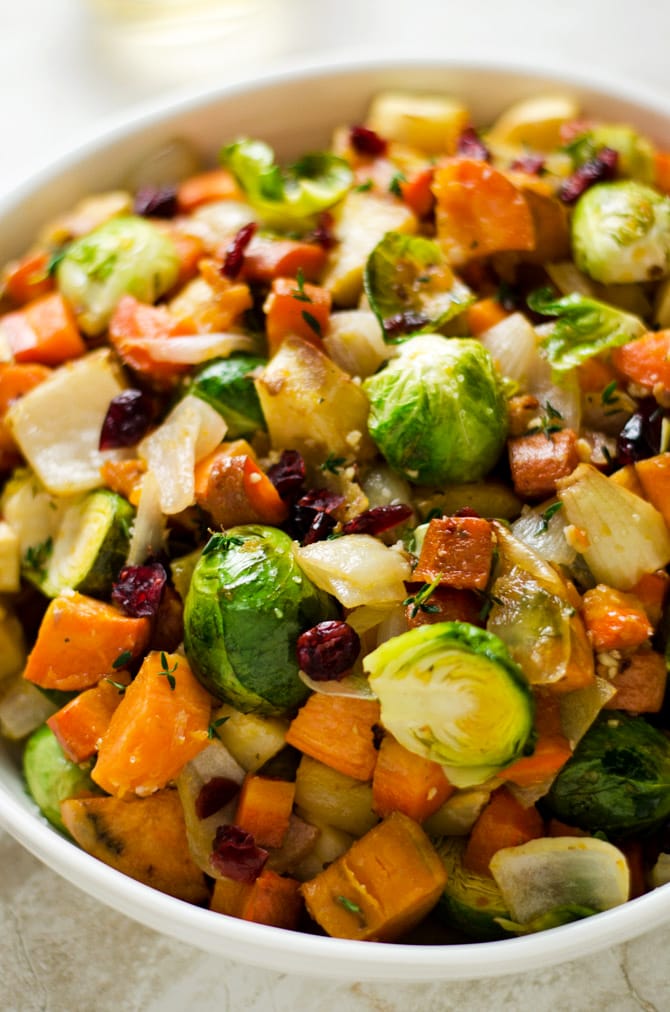
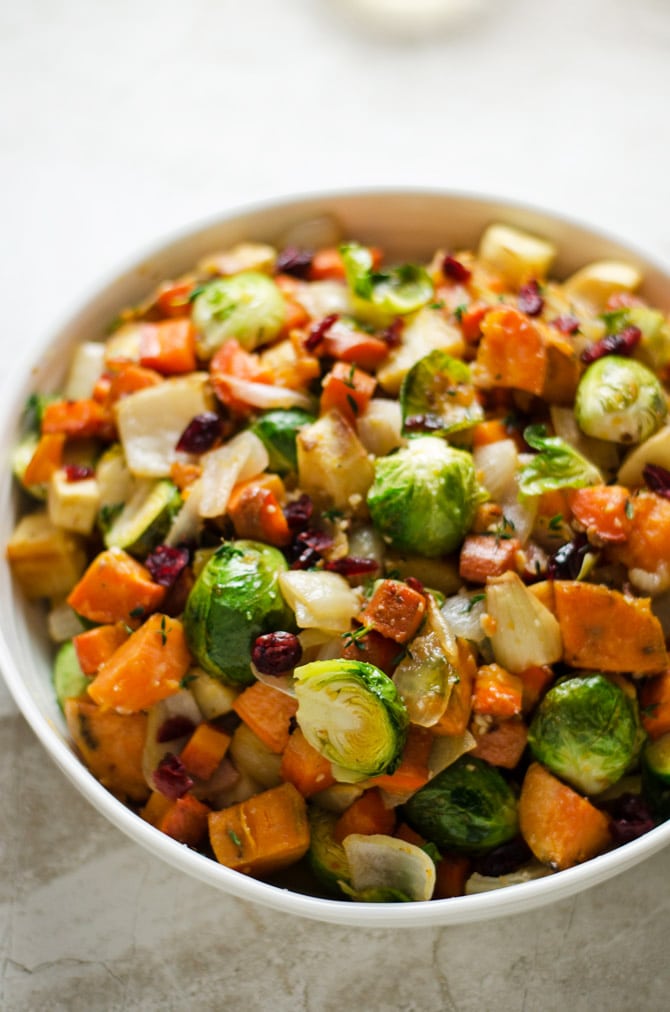
Alright, on to the vegetables. You can choose from a variety of veggies to cook beneath your turkey. I've thought about including squash (yes, they're technically fruit, I know), celery root, and rutabega, but this time, I chose carrots, parsnips, sweet potato, and onion. I roughly cut them up and throw them in a large roasting dish-- no oil necessary, no seasonings, just veggies. I place the turkey directly on the oven rack in the middle of the oven, and place the dish of vegetables on a rack below. The drippings will drip down into the veggies to prevent them from burning.
But since we're talking about burning, this is very important: If your turkey hangs over AT ALL so that some drippings might not wind up in the roasting pan, you need to place baking sheets below the roasting pan to catch any drippings that might drop down so that they don't burn at the bottom of the oven. Or, even better, use an oven liner for super-easy clean-up. No one wants the smoke alarm going off while your guests are waiting for dinner!
These root vegetables take a long time to cook through so they cook under the turkey the entire time, but I also like to mix in some greens such as brussels sprouts or broccoli which don't take as long to roast later in the cooking process. The variety makes for a real hit of a side dish.

I know they usually say to cook your turkey until the juices run clear, but in this case, you can't trust the color of the turkey juices. Sometimes they can wind up somewhat pinkish due to the cranberry juices mixing in. Instead, use your thermometer to make sure that the turkey is cooked through. The breast needs to measure 155-158°F before you pull it from the oven.
I happen to think it looks beautiful they way it comes out of the oven:
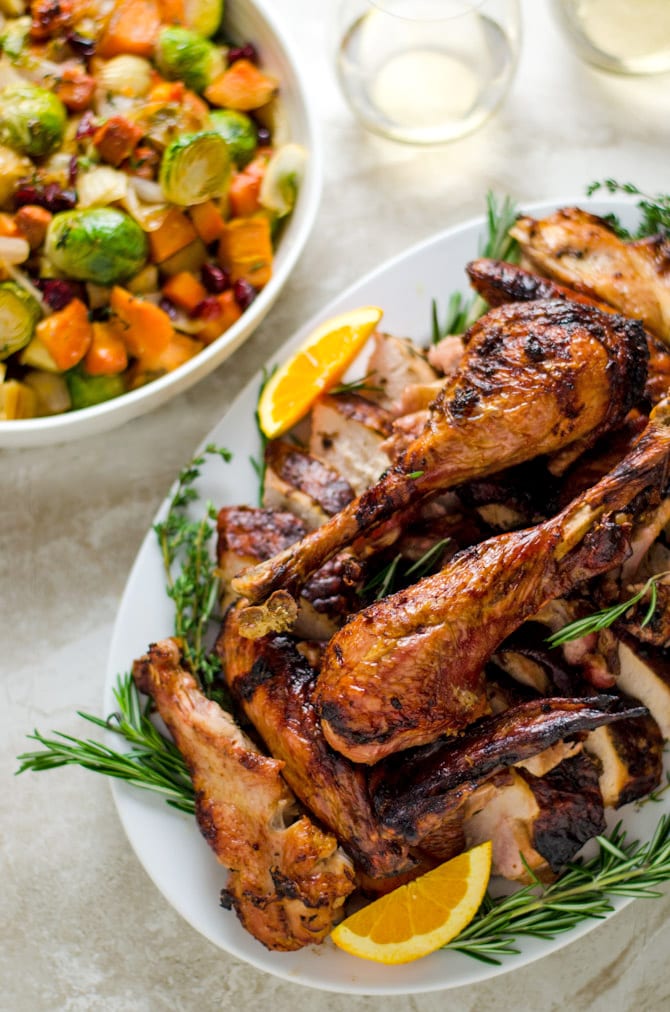
But if you think it looks goofy, you can carve it up before serving. Just be careful-- the meat is so tender that it tends to just fall apart as you carve it.
Well, really that's a good thing.
And we obviously can't forget about the vegetables! Using a slotted spoon, I remove the vegetables from the roasting pan and set them aside while still hot. I'm left with a bunch of delicious turkey juices at the bottom of the dish, ¼ cup of which I transfer to a separate container for when I make my gravy. I pour in some apple cider vinegar with the remaining juices and stir it all together well, scraping up any little browned bits on the bottom of the pan.
With the remaining thyme and dried cranberries mixed in, the drippings add the final punch of flavor to those roasted veggies.
And finally, it's all ready to serve. Well, not before sneaking a few of those blackened bits, of course. I told you, they're impossible to resist.
If you really want to blow away your guests this holiday season, give this recipe a shot. I'm willing to wager that you'll never go back to your old turkey method again.
Oh, and when you do make this holiday dinner, don't forget to take a picture-- bonus points if you get another of your family enjoying it. I'd love it if you would show it off on Instagram with the tag #hostthetoast. If you do, it'll also show up on the You Made It page!
Print
Crispy Cranberry-Herb Butter Butterflied Turkey with Roasted Vegetables
- Total Time: 2 hours 45 minutes
- Yield: 12 1x
Description
Adapted from Alton Brown
Ingredients
- 1 cup dried cranberries, divided
- ½ cup (1 stick) unsalted butter, softened
- ¼ cup fresh thyme, chopped, divided
- 2 tablespoons fresh sage, chopped
- 2 tablespoons fresh rosemary, chopped
- 1 tablespoons freshly grated orange zest
- 4 cloves garlic, minced, divided
- Kosher salt and black pepper, to taste
- 1 (12-13 pound) whole turkey, spatchcocked according to in-post instructions
- 3 sweet potatoes, cut into large chunks
- 2 carrots, cut into large chunks
- 2 parsnips, cut into large chunks
- 1 large white onion, cut into large chunks
- 8 ounces brussels sprouts, trimmed and halved
- ¼ cup apple cider vinegar
Instructions
- Place one oven rack in the middle of the oven, and a second below it. Preheat the oven to 450°F.
- Place ½ cup of the cranberries; the softened butter; 2 tablespoons of each the thyme, sage, and rosemary; the orange zest; and half of the minced garlic in the food processor. Process until well-combined. Season, to taste, with salt and pepper, and process once more. Transfer to a bowl and set aside until ready to use. The compound butter can be made and refrigerated for up to a week ahead of time.
- Spatchcock the turkey and dry thoroughly using paper towels. Using your hands, carefully lift and separate the skin from the flesh of the turkey, working through the opening at the bottom of the breast all the way up both breast halves and across each thigh. Rub half of the butter in under the skin, directly on the turkey breast and thighs. Massage on top of the skin to get the butter to evenly distribute.
- Rub the remaining butter on top of the skin. Make sure to evenly coat the turkey. Sprinkle the turkey with additional salt.
- In a large, sturdy roasting pan, mix together the sweet potatoes, carrots, parsnips, and onion.
- If the turkey is larger or almost as big of the roasting pan, make sure to line the bottom of the oven with either an oven liner or two baking sheets to catch any potential stray drippings.
- Place the roasting pan on the bottom rack and place the turkey directly on the rack above it, positioned so that the turkey drippings will go into the roasting pan.
- Transfer the turkey and vegetables to the oven and roast. Check the turkey to make sure it's browning evenly every 30 minutes (if not, rotate the turkey). Stir the vegetables every 30 minutes. If the turkey is browning too much, tent with foil.
- After 1 hour, mix the brussels sprouts and remaining garlic in with the other vegetables. Stir. Continue to cook until a thermometer inserted into the turkey breast registers 155-158°F, and the thighs register 165°F, about 20 to 30 more minutes. Remove from the oven and let rest for 30 minutes before carving.
- While still hot, transfer the vegetables to a serving bowl using a slotted spoon. Transfer ¼ cup of the drippings to a separate container for making gravy. Pour the apple cider vinegar into the roasting pan and stir with a wooden spoon, scraping up any browned bits. Add in the remaining thyme and dried cranberries. Pour the mixture over the roasted vegetables and toss. Serve warm.
Notes
Feel free to use different root vegetables, if desired.
It's very important to make sure that the turkey drippings will not wind up burning on the bottom of your oven, or your kitchen will wind up smoky. Again, I highly recommend using an oven liner or baking sheets to catch excess grease.
- Prep Time: 1 hour 15 mins
- Cook Time: 90 mins


Louise says
Can't wait to try out so many of your delicious recipes